
Old computers need not lay in tips. In fact, they can still be quite useful, even well past the point where the manufacturer stopped supporting them. With a bit of patience, you can have a perfectly functional computer to manage your media and rip your CDs.
Recycling an old iMac as a media centre
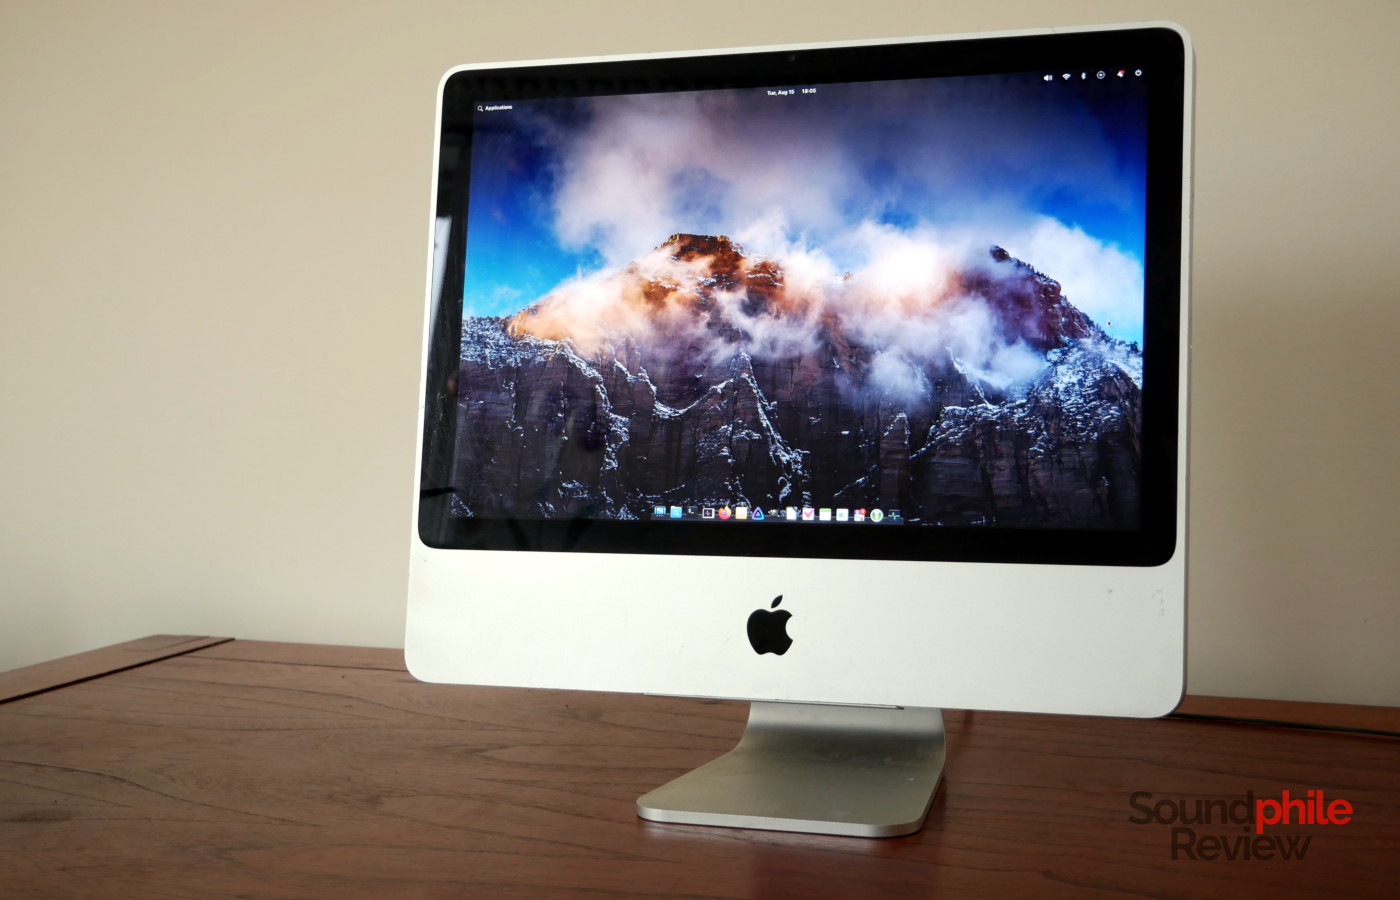
Two years ago I bought an old iMac 7,1 from 2007: I wanted to experiment with an open source operating system that seemed quite attractive (helloSystem), only to find out that the iMac isn’t supported at all. Not a major problem, as I only paid £29 for it (around $40). The problem then became: what to do of this machine? Selling it again was an option, but it takes effort and time. The iMac was perfectly functional as a computer and still powerful enough to deal with a few tasks, even though it is severely limited by the maximum 4 GB of RAM and by the processing power of its old CPU. I also find it quite beautiful purely as an object, though of course this is dependent on your own taste.
I decided then to keep it and use it as my media centre – and by that I mean, my computer to manage my multimedia collection, especially music, and rip CDs. As there are charity shops in my area that sell CDs for next to nothing, I often snatch interesting CDs that I then rip to FLAC. For the past several years I have used an external unit connected to my laptop, but that isn’t super convenient. I then realised I could use the iMac’s own integrated DVD drive to do that. The iMac can also be used to stream music to speakers either through Bluetooth or using DLNA over WiFi (e.g. to the Lindemann Limetree Network or the Arylic S50 Pro+ I have).
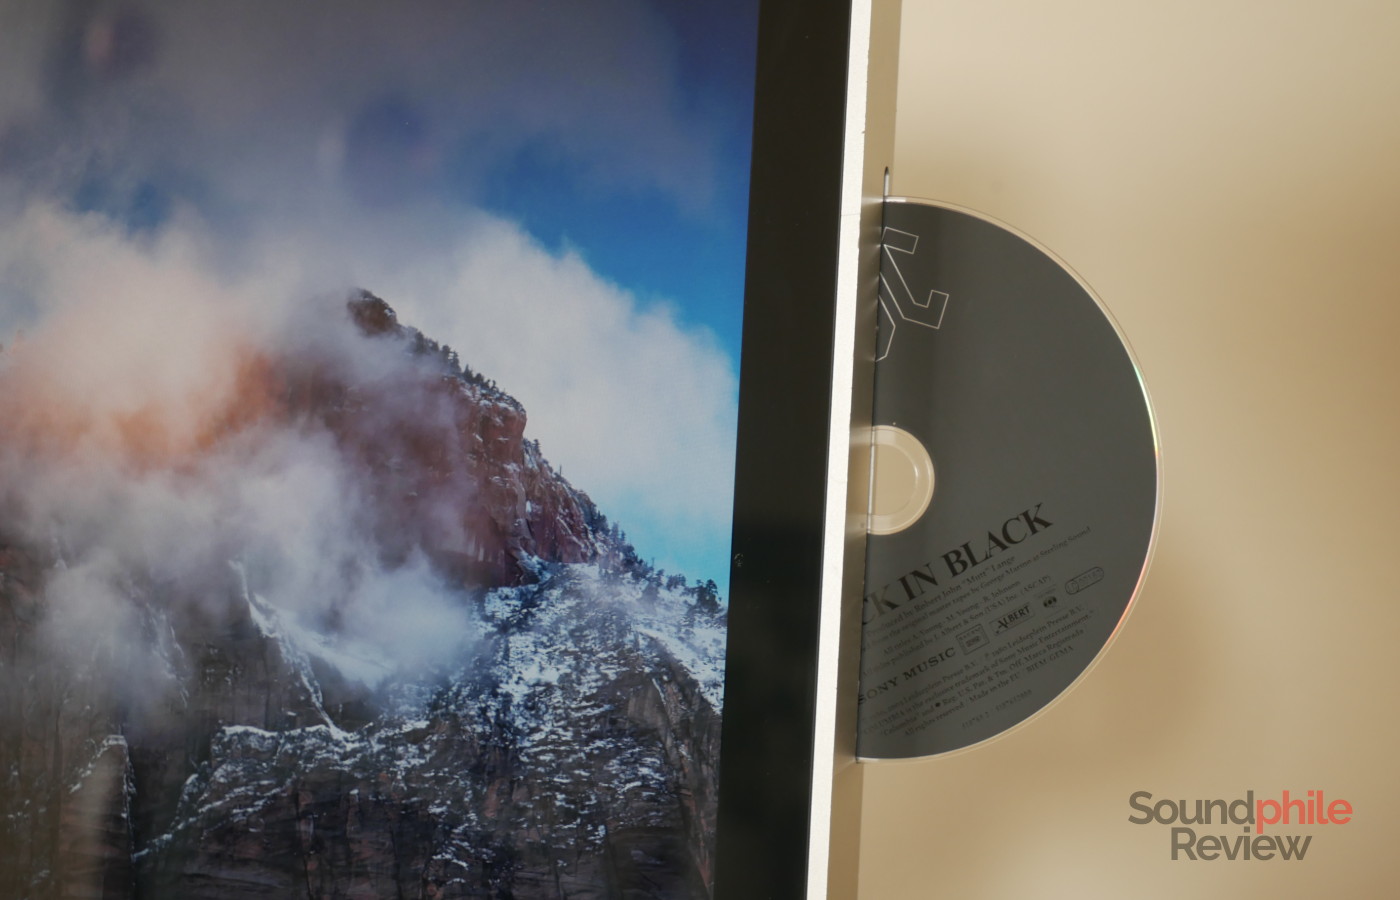
The tricky bit in my case was that I found that the Superdrive unit, which is the DVD drive in Apple’s parlance, was not working. I learnt it the hard way, as it accepted a CD but then wouldn’t read it… nor give it back! Taking the iMac apart is not an issue once you use a couple of suction cups to remove the glass; once you do that, it is actually really easy to replace the Superdrive (and it only costs a few quids to buy another one). You may be luckier than I was in any case and your unit might work perfectly well.
Choosing an operating system for the iMac
The problem I was facing with this iMac, though, was not so much of hardware nature, but rather of software. The last macOS version supported is the now ancient OS X 10.8. Finding software for it is quite difficult, and it doesn’t support the latest applications (for obvious reasons). Even though this iMac will never actually need to do much, apart from surfing the Web and managing some media, the old OS is a strong limitation. There are, however, alternatives.
Windows is out of the question, as the last supported version would be Windows 10 and it wouldn’t work that well on it, given the 15 years the iMac has on its shoulders. Linux, on the other hand, is free (both as in freedom and as in beer) and it’s open source, and I am quite fond of it, having used it on all of my devices for the past ~16 years. I then looked at the various options there: my go-to distribution is KDE neon, as it is the home to my favourite desktop environment, KDE Plasma. While it works perfectly fine on the iMac, it is the OS I use on all my other devices, so I wanted something different. I am not too fond of GNOME, so I discarded all distros that come with it.
I decided to install elementary OS on it. It is a Linux distribution which is meant to be a home for macOS users: it offers a very similar interface as well as general aesthetic and mindset, while being based on Linux and offering support for a wide variety of hardware configurations. It turns out that it works perfectly well with the iMac, although the installer complains that the EFI partition isn’t big enough: if you resize the macOS partition (either directly from the elementary OS installer or from macOS itself) you can then move it and increase the EFI partition to 500 MB, so that you will be able to install elementary without issues.
The only thing that requires a bit more fiddling are the WiFi drivers: if you connect the device to the network via an Ethernet cable, though, the system should automatically offer to install the missing drivers (and in case it doesn’t, this is easily fixed: just open a terminal and type sudo apt install firmware-b43-installer b43-fwcutter bcmwl-kernel-source!).
What software to use for Linux media centres
Before starting, one small note: in the following section I give general instructions on how to do various things, but I assume that you already know some basics of using a computer and, in particular, Linux. This is not meant to be a step-by-step guide, but rather a general indication of what you can do and achieve.
Once the WiFi drivers hurdle was in the past, the iMac was perfectly functional and I could start setting it up as my media centre. Given it has in my experience proven more stable than PulseAudio, as well as more flexible, I prefer using PipeWire as the audio server. In order to install it, you simply need to configure the software repository and install the relevant packages – you can find instructions here. This is absolutely not necessary and, if you are not comfortable with dabbling with the terminal, I actually suggest not to do it. The advantage of PipeWire is that it makes it really easy to manage things like a system-wide equaliser, and it supports high-quality Bluetooth codecs (including LDAC) out of the box, making the iMac a capable Bluetooth source despite its age.
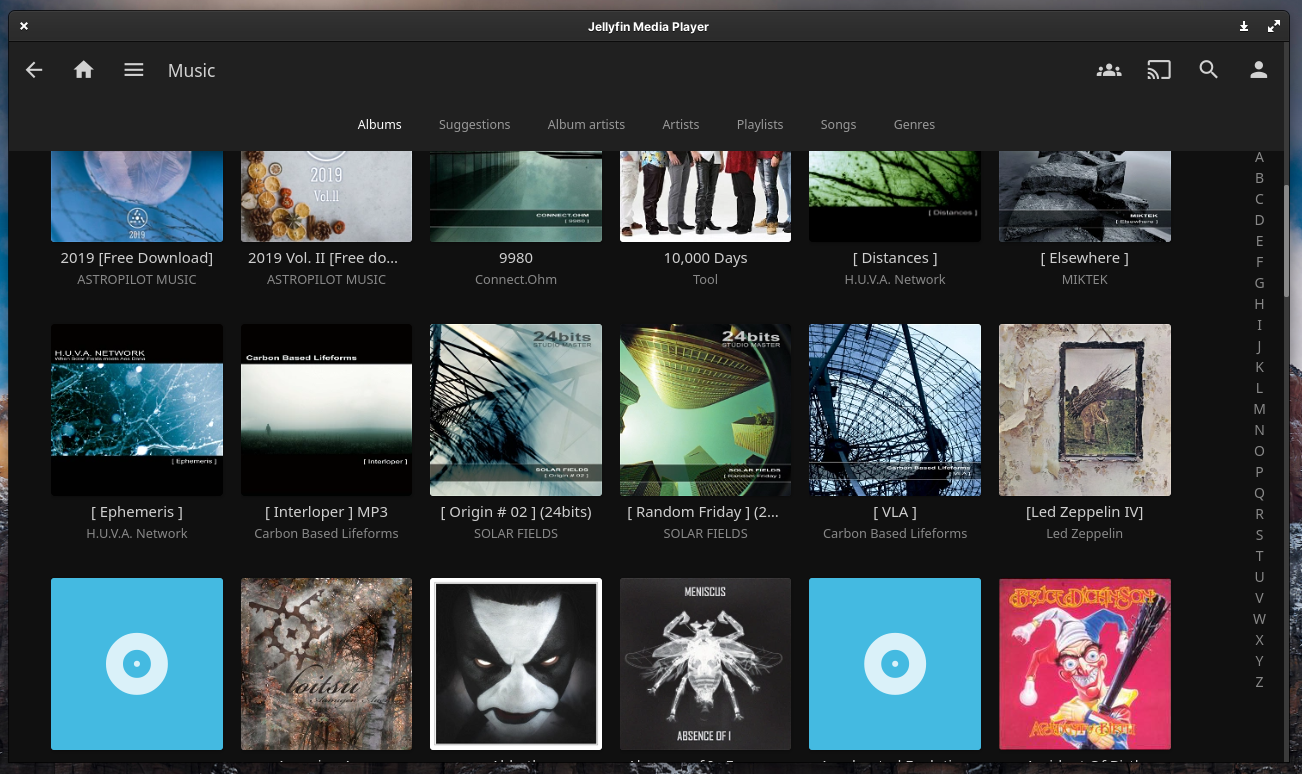
I use Jellyfin to make my music and movies available over my network, so I downloaded its own dedicated player. It comes handy if you want to manage multiple types of media with an interface and functionality that are similar to Plex and Spotify. Plex is indeed an alternative, as are Emby and Kodi.
I also mounted the music folder hosted on my NAS directly onto the Music folder in my user’s home folder so that when I rip music it is automatically transferred to my NAS. To do this, I installed the NFS tools (sudo apt install nfs-common), then edited the fstab file (you can use sudo nano /etc/fstab) to include the NFS mount (with a line that says 192.168.1.10:/mnt/main/riccardo/Music /home/riccardo/Music nfs _netdev,rw,user 0 0, just replace the IP and mount path with the ones that apply to your case). Doing this means that you will have no music directly on the device, so it is up to you whether to do it – and you will obviously need a NAS with a shared NFS folder in order to do it!
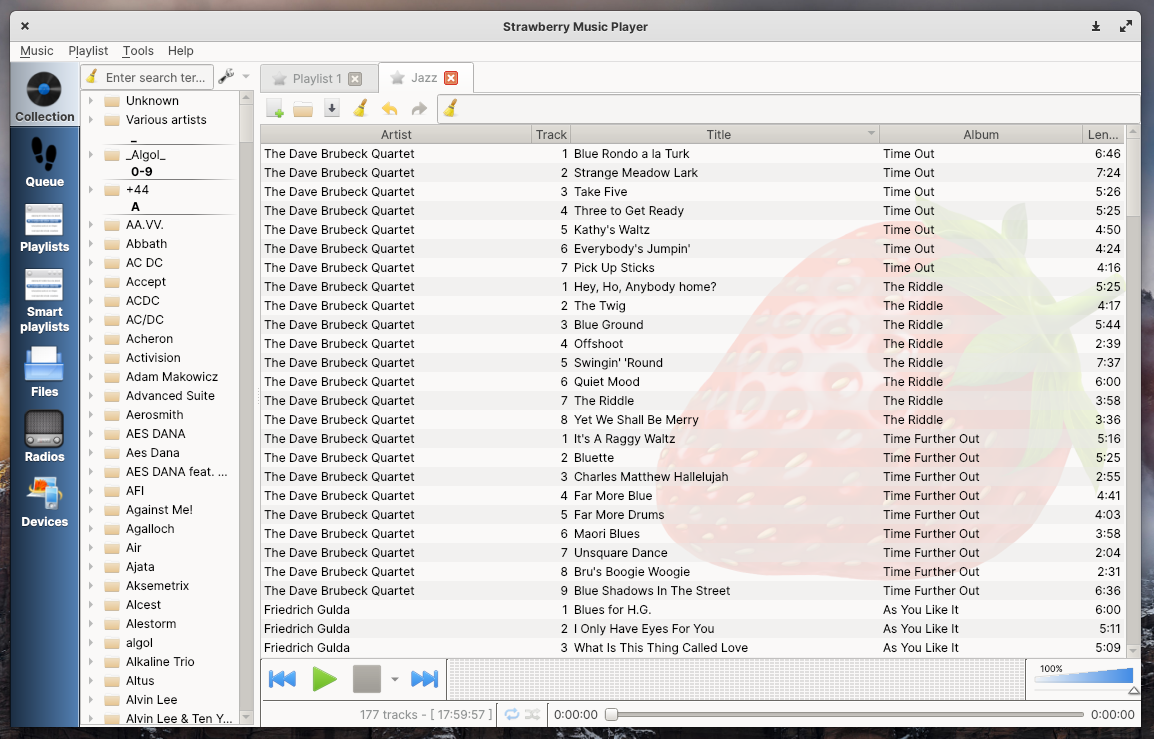
My music player of choice is Strawberry. It is a fork of Clementine which was created after the developers of the latter explicitly stated that they don’t care about audiophiles and refused to re-implement some functionality that they had removed (support for ALSA playback, for those interested). It allows you to manage your music through playlists which are shown as tabs and has lots of interesting options, plus a clear and clean interface. It is a bit reminiscent of foobar2000, at least the way I used to use it with a tabbed UI, a lifetime ago. It offers a lot of tools, including cover art search and download, automatic tagging and so on.
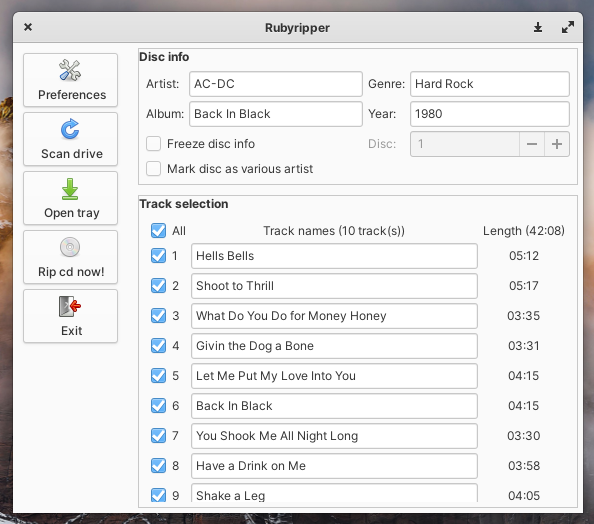
Now for the CD ripping part: the software I use is called RubyRipper and is available here, where you can also find the instructions to install it (that requires a bit of terminal work, but it’s all clearly explained). RubyRipper can rip CDs in a “bit-perfect” fashion, which means it can rip the CDs exactly a they are on the physical medium. The way it does this is through multiple readings: it reads the CD multiple times (you can configure how many), so you can be sure that what it reads is not influenced by temporary errors (or, even worse, by permanent errors caused by imperfections or damage to the CD). It works rather well and is a great alternative to Windows-only software like Exact Audio Copy (or EAC in short). It can take up to one hour to rip a CD, but you’ll then be sure the FLAC file you get is going to be exactly the same as the CD you just ripped!
A man’s trash is another man’s treasure
In this post I gave you a few ideas on how to recycle an old iMac, but this obviously applies to basically any old computer. In fact, in the end I decided to sell the iMac in this article and I got a newer version: it is one from 2011, which is the last model to feature an optical drive, which I got for £50. You don’t need an iMac, however; in case you want to use it as your CD ripping station, you really only need it to have a CD or DVD drive, or to buy an external one – you can get them from Amazon for very cheap prices (as an example, this LG USB drive is only $24).
With old computers, whatever their make, you probably won’t be able to reproduce movies in 4K, but that’s not the aim either. Having a computer you can connect to your audio devices, or which you can use to control playback on your media streamer over the network, is worth the hassle of installing the software and configuring it. By the end of the process you’ll have much more than some old electronic junk, and you will find instead that your old devices can still be put to use for practical applications. Conversely, it is very easy to get an old computer for little money and convert it to your media centre, so it might be worth taking a look at it.